Granola Energy Bars

IMG_3570

I kind of have a thing for granola…and therefore granola bars. Unfortunately, granola bars are one of those snacks that don’t often receive great marks for health. Majority of those store-bought or packaged bars contain a lot of refined, processed sugar and they don’t actually fill you up. Half the time you don’t actually know what’s inside of them. These bars however, are different. I developed this recipe a couple of month’s ago for the Waitrose Kitchen magazine in the UK and they were very well received. There is something to be said for knowing what goes into your food, especially something that you may need pre or post workout for that extra boost of energy. Made with natural binding agents like medjool dates and almond butter, these bars are packed with protein and carbohydrates that will fuel you through the day. They do contain sugar, but naturally through the dried fruit and honey so your body processes it slower. Easy to prepare and packed with nutritious ingredients, these really are the perfect bar for a hearty snack because they keep you full for hours and don’t provide a sugar overload. Plus, they pack in plenty of healthy fats from the nuts and lots of fiber from the oats. You can easily substitute a different nut butter or variety of nuts and seeds within the bars, just be sure to keep the quantities the same. Keep stored in a container in the fridge for as long as they will last… I promise it won’t be long!

Almond Butter Energy Bars

Makes 12 large bars or 24 small bars
Prepare 15 minutes, plus chilling
Cook 20 minutes

IMG_3568

250 g (2.5cups)   Rolled Oats ( I like to use quick porridge oats, large flakes are too big!)
40   g  (2/3 cup)  Desiccated coconut
40   g  (1/2 cup)  Sliced Almonds
40   g   (1/2 cup)  Pumpkin seeds
150 g   (approx. 5 or 6)  Pitted medjool dates
50   g   (approx. 3) Prunes
85   g   (1/4 cup)  Honey
100 g   (roughly 1/2 cup) Meridian Crunchy Almond Butter
1 tbsp    Coconut Oil
3 tbsp    Water
1 ½ tsp  Ground Cinnamon
Pinch of SaltIMG_3538

Method

    1. Preheat the oven to 165C. Line a tray with parchment paper. Combine oats, coconut, seeds and nuts. Toast for 20 minutes, tossing occasionally until golden brown
    2. Meanwhile, in a food processor combine the dates and prunes and blitz until a smooth paste has formed. Add to the honey, almond butter, coconut oil, cinnamon, salt and water in a small saucepan. Place over medium heat and stir until combined.IMG_3545
    3. In a large bowl combine the oat mixture with nut butter mixture and stir until it has come together.
    4. Place mixture into a 9 “ square or rectangular mould lined with parchment paper, ensuring the surface is flat and even. Refrigerate until the mixture is firm and cool, 15-20 minutes. Slice into bars.IMG_3557

*If your dates don’t feel sticky and moist, soak them in water for 10 minutes then drain before processing. This will ultimately help hold the bars together better.

Lemon Coconut Loaf


IMG_3486

Coconut and lemon are a match made in heaven, and when that match is a dense crumbed, delicious and butter-less lemon loaf, well you may as well skip the rest of this and head straight to the recipe. But before you do, let me just point out that this is one of those cakes you need to have in your repertoire of baking. A slight variation on an otherwise very simple lemon yoghurt cake, the coconut and honey add a surprisingly decadent flavour and the ground almonds give the cake the perfectly dense texture similar to a pound cake ladened with butter…except there is none, so you can eat another piece, right?

Make this cake ahead and it stores well in the fridge for a couple of days but like many baked goods, it’s best moments are when it’s pulled straight from the oven, slathered with soft butter and served with a cup of tea.

IMG_3508

Ingredients:

1 cup all-purpose flour
1/2 cup ground almonds
2 teaspoons baking powder
1/2teaspoon kosher salt
1/2 cup sugar
2 tbsp honey
2 tablespoons finely grated lemon zest
1 tbsp lemon juice
3/4 cup whole-milk Greek yogurt
1/4 cup vegetable oil
2 large eggs
1/2 teaspoon vanilla extract
1/2 cup sweetened desiccated coconut

IMG_3476

  • Preheat oven to 350/180C. Line a nonstick loaf pan with parchment paper
  • In a bowl combine flour, ground almonds, baking powder and salt. Whisk to combine.
  • In a separate bowl combine sugar and lemon zest, rubbing the mixture together. Add yogurt, honey, lemon juice, vegetable oil, and vanilla. Add eggs, one at a time, whisking to combine.
  • Fold the dry ingredients into the egg mixture, finishing with the coconut.
  • Pour into the loaf tin and bake for 45-50 minutes until a toothpick comes out clean. If you find it’s browning too quickly, tent with tin foil. Remove from the tin and allow to cool slightly before digging in.


Date and Almond Energy Bites

dateswhole
Having spent time living in the Middle East I’ve become a big lover and fan of Medjool dates. They remind me of a much more relaxed and slower pace of life during Ramadan when dates and a glass of milk are often used to break a fast. Dates are not only rich in dietary fibre and antioxidants but these soft, delicious fruits can quickly boost your energy (which is needed when you have not eaten all day). While dates are quite sweet, they are an excellent low fat natural substitute for sugar or processed sweeteners. What’s more fantastic about them is that they contain key minerals that your body requires to maintain a healthy heart and blood pressure and prevent cardio vascular diseases, arthritis and other inflammation related ailments. These wonderful little fruits are great for no-bake raw recipes because the stickiness helps bind other ingredients together. In this recipe, I’ve created some simple but very tasty date and almond energy balls and added some raw cacao powder which is sure to satisfy your chocolate craving!
dates

Makes 12 energy balls

1 ½ cups raw almonds, 200g, (reserve 2 tbsp for dusting at the end)
2 tbsp raw cocao powder
1 tsp chia seeds
½ tsp fine salt

25 Medjool dates, 200g
2 tbsp raw almond butter

  1. Ground almonds in a food processor until finely ground (if you don’t have a strong enough processor, buy raw ground almonds and use 1 ¾ cup). Set aside 2 tbsp for dusting.
  2. Add cocoa powder, chia seeds and salt to the almonds.
  3. Remove pits from dates and add to the processor along with almond butter and blend until it forms a paste.
  4. Scoop a spoonful into your hand and roll into a bite-sized ball – make 12.
  5. Lightly roll the balls in ground almonds (optional).

Store these delicious little bites in a container in the refrigerator. Try not to eat them all at once!

(Not your typical) Banana Pancakes!

IMG_3417

Waking up late on a weekend often calls for a good brunch. Whether it’s a remedial (too many glasses of wine the night before) or just simply taking the time to savour a long, and often big breakfast with friends, brunch has become the “it” girl of the food world. So many restaurants now offer the best brunch in the city, featuring gourmet eggs benny among other artisanal ingredients and culturally fused dishes. There is something to be said however, for being able to make a killer brunch at home while remaining in your pj’s with a big mug of coffee and the weekend post… especially when its 20 below.
Scouring some newly acquired cookbooks has become a daily activity, and there are always recipes I go back to time and time again. These “pancakes” were one in particular that struck my attention as they had two of my all time favourite breakfast ingredients in them, simply oats and bananas. I was already a huge convert to porridge as my breakfast mainstay so one look at these deliciously nutty, crispy on the outside but soft in center banana fritters and I was sold. Despite the lack of your typical pancake ingredients, these little fritters pack a flavour punch. Turns out, gluten/dairy/egg and sugar-free things aren’t so bad after all!
The great thing about these pancakes is the flexibility of ingredients. Don’t like almond or coconut milk? Try substituting soy or rice milk. Dislike cinnamon? Try a pinch of freshly grated nutmeg. There are a million ways that you can tailor this recipe to be your own so feel free to experiment!

Oat and Banana Pancakes

1 cup oats (gluten-free work just fine!)
handful of pecans or walnuts chopped ( I like to do it in a food processor)
1 vey ripe medium banana
1 tsp baking powder
1 tsp ground cinnamon
1 tsp ground flax
160-180 ml of almond or coconut milk
blueberries or raspberries
coconut oil or butter

1.In a food processor, blend the oats until flour consistency. Empty into a bowl along with baking powder and pinch of salt, flax and cinnamon.
2.Add the banana and 160 ml of milk to the food processor and blend until smooth
3.Combine the banana mixture with oat mixture and pecans. Add the additional 20 ml of milk if the mixture looks too thick, it should be the consistency of  a loose porridge. Allow to sit for 5 minutes to activate the baking powder.
4.Heat coconut oil or butter in a nonstick pan. Add a tablespoon of batter and flatten it a bit. Add a couple of blueberries on top, as soon as bubbles appear, flip the pancake and cook until golden brown on both sides
5.Serve with maple syrup, coconut yoghurt and extra butter!

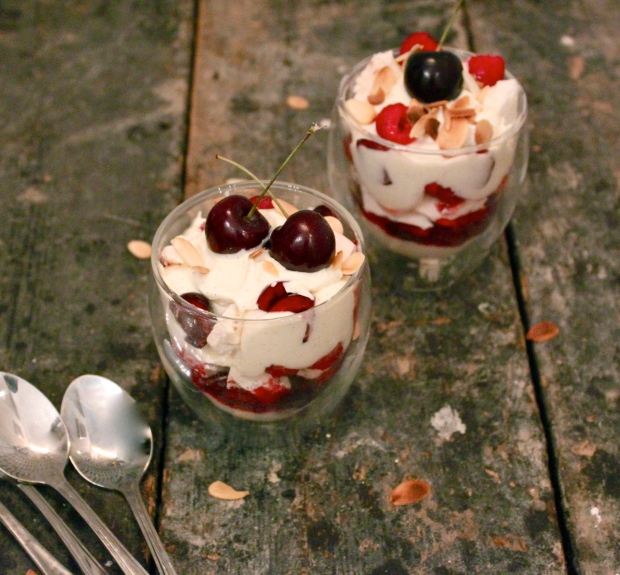
Cherry Raspberry Eton Mess

_MG_5582

A heat wave has hit London, and for the past couple of weeks it’s been one hot, humid mess in the city. It’s hard to complain though when 95% of the time here it’s either raining or overcast, so everyone tries to make the most of the sunshine and warmer temperatures.

Baking in this weather requires serious determination. Resisting the temptation to turn on the oven in my flat (which has no air con) and make something that requires little time in the kitchen is why a fresh summer dessert like an eton mess is the perfect option, and it’s oh so simple to make.

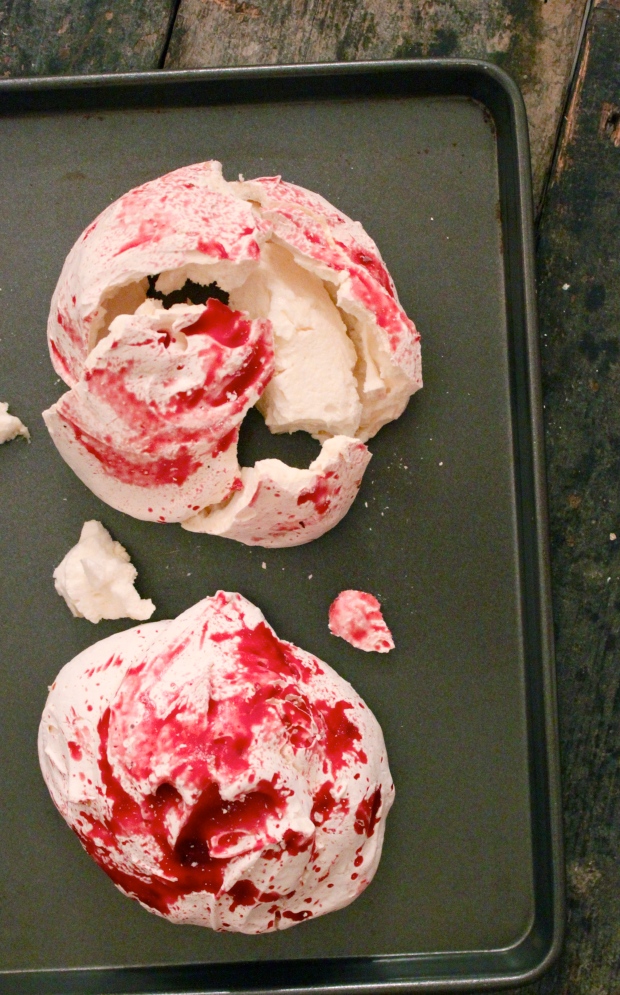
A very traditional pudding (that’s dessert for you North American folk) in the UK and named after one of the most prestigious colleges, it is typically comprised of meringues, cream, and strawberries. Probably one of the easiest desserts to build your own interpretation on, using whatever seasonal fruits or berries you would like. I chose cherries, which are just coming into season and raspberries to compliment the sweetness from the cherries and tartness from the yoghurt I folded into the cream. I’m cheating a little by using store-bought meringues, but they happen to be raspberry meringues from Ottolenghi so I don’t feel too bad. Try and find the best quality meringues you can, the ones with the gooey center and crisp outside work best for a dessert like this. Eton mess also happens to be perfect for crowds, similar to a trifle you can build it in a large bowl just make sure you serve it right away as you want maintain the crunch in the meringue. Perfect for hot summer nights with an aperitif, it’ll make you wish summer would last just that little bit longer.
_MG_5574

Serves 4
*quantities can easily be increased, just ensure the cream is approximately double the amount of yoghurt

2 large meringues, broken into large and small pieces
300 mL double cream
170g plain greek yoghurt
1 vanilla bean, split and seeds removed
¼-1/2 cup icing sugar, depending on the sweetness you want
250g raspberries (one punnet) divided in half
250 g cherries, pits removed but leave a couple whole for garnish
3 tbsp granulated or caster sugar
½ lemon, zest and juice
¼ cup shaved almonds, lightly toasted

_MG_5567

Compote

  • In a small saucepan combine half the raspberries and cherries with lemon zest, juice, and sugar
  • Bring to the boil and then reduce to a simmer for 10-15 minutes
  • Transfer to a small bowl and allow to cool completely. This can be made up to 2 days in advance and stored in a air tight container in the refrigerator

Mess:

  • In a large metal bowl, gently begin to whip the cream until soft peaks begin to form. Add the vanilla and sugar and whisk a bit further.
  • In a separate bowl, whisk the greek yoghurt until smooth. Gently fold into the cream mixture
  • In your serving dish begin to layer the items beginning with the cream, then the compote, remaining fresh berries and meringues. Repeat as many times as possible in the serving dish. Top with cream and toasted almonds. Serve immediately


“Green” Bulgur Salad


Processed with VSCOcam with f2 preset

There is something about a good salad recipe that will never get old. Sure you can experiment with interesting flavour combinations or exotic ingredients, but there is comfort in familiarity and simplicity that makes certain dishes really stand out.

I came across this recipe in one of Ottolenghi’s books and what really drew me in was the herb paste used to turn the couscous from grainy yellow to vibrant green. Brilliant! (I thought to myself as I began to rummage through my fridge searching for the necessities). I for one love couscous but thought I would use another grain I’ve become all too fond of recently, bulgur wheat. Healthier, nuttier, and full of texture, bulgur is a great whole grain substitute to couscous (which is essentially pasta). I do feel like I’ve used it quite a bit in recipes posted, but it’s just become so versatile in my kitchen (so apologies, if you want to use couscous, please feel free to stick to it!)

The herb paste is basically a pesto, which with help from some lemon juice and zest, transforms this salad into something spectacular. It’s so fresh and packed with robust flavours from five different herbs. You can easily substitute the herbs or add more of one or another if you fancy. The salad can be dressed up to 2 hours before eating and is great cold or at room temperature. As with most of our salads, a good sprinkling of pomegranate seeds and a ripe avocado make the perfect finishing touch.

“Green” Bulgur Salad

120 g bulgur wheat (600 mL of water to boil)
1 avocado, diced
½ pomegranate, seeds
¼ cup whole almonds, roughly chopped and toasted
1 onion, finely sliced
1 tbsp olive oil
1 pack of rocket (I used a rocket, watercress and baby spinach mix)

Herb Paste
4 tbsp coriander
4 tbsp parsley
3 tbsp dill
3 tbsp tarragon leaves
3 tbsp mint leaves
1 lemon, zest and juice
1/3 cup extra virgin olive oil
salt and pepper to taste

  • In a saucepan, add the bulgur wheat and cover with water. Bring to the boil, reduce and simmer covered for 15 minutes. Drain and rinse well with cold water. Spread bulgur onto a clean dishcloth to absorb any excess moisture.
  • In a small pan, gently heat olive oil over medium heat and add onion. Cook for 10-12 minutes until the onion slices are nice and caramelized. Remove from heat and let cool.
  • In a food processor, combine all herbs and blitz until a paste begins to form. Add olive oil, lemon juice, zest, salt and pepper and blend until smooth.
  • Combine the bulgur with the herb paste, avocado, pomegranate and almonds. Add half of the mixed greens and toss.* it is at this point that you can cover and allow the salad to sit and marinate
  • Before serving, toss with remaining greens and a sprinkling of sea salt and freshly ground pepper


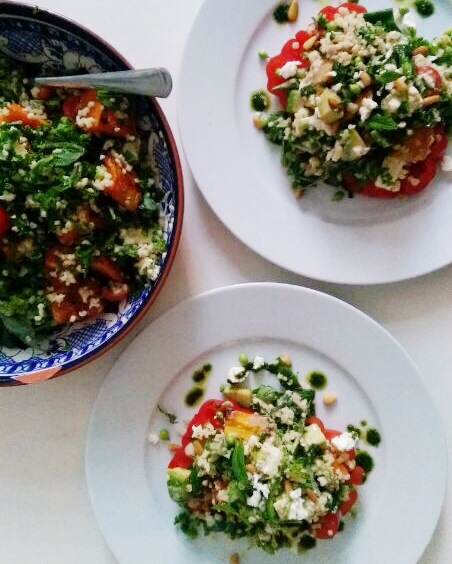
Roast Squash and Bulgar Salad

photo 3

Having people over for dinner doesn’t always have to be a big fuss. There is a huge misconception that you need to slave over the stove all day to make a meal worthy of your guest’s palettes (fellow foodies and chefs alike). Sometimes the simplest meals can end up being the best, because what’s really important is the company that you tend to. That being said, a substantial yet satisfying salad was the result of a busy week and inspiration for a quick meal with friends.

I’ve been searching for my quinoa substitute. Don’t get me wrong, I still absolutely adore cooking with quinoa, but I felt in need of inspiration to cook an alternatively healthy grain. I recently tested a recipe for work that used bulgar wheat. Low in fat, high in fibre and rich in minerals, bulgar wheat is the chewy nutty grain most commonly found in the middle eastern specialty tabbouleh. It works really well chilled in a salad, adding great texture and can hold its own to substantial vinaigrettes.

This salad is vegetarian, but you could easily serve it alongside grilled chicken or fish. Personally I don’t mind going “meatless” through the week because you can find all the necessary nutrients in other foods such as dark leafy greens and whole grains.

Roast Squash and Bulgar Salad

120 g bulgar, cooked in 600 mL of water, drained and rinsed
3 cups kale, shredded
1 butternut squash, peeled and cut into 2 cm pieces
1 pint cherry tomatoes, halved
2 cups fresh peas, shelled or 1 cup ready shelled peas
2 tbsp pine nuts, toasted
1 avocado, diced
4 oz. feta cheese, crumbled
1 large handful of fresh basil, leaves torn
1 large bunch of fresh mint, leaves torn

Dressing
1 lemon, juiced and zest
3 tbsp pomegranate molasses
1 tbsp honey
2 tbsp olive oil
2 tbsp tahini, diluted with 1 tbsp water
Salt and pepper to taste

Basil Oil
1 cup fresh basil
½ cup – 1cup olive oil
salt and pepper

1. Preheat the oven to 200C/400F, arrange the squash on a baking tray and coat with olive oil, salt and pepper. Roast for 35-45 minutes or until tender. Remove and let cool
2. For the basil oil, add the leaves to a food processor and gradually add the oil until a thin consistency. Season with salt and pepper.
3. Add the bulgar to a small pot and bring the boil, cover and cook for 15 minutes. Drain and rinse with cold water.
3. Combine all ingredients for the dressing and in a large bowl add a couple of tablespoons to the kale and massage until tender and shiny.
4. Add the squash, peas, cherry tomatoes, avocado, and bulgar to the bowl of kale and toss to combine with the remaining dressing.
5. Top with pine nuts and crumbled feta and drizzle with basil oil

*I recently made a variation of this salad and added pomegranate seeds and substituted toasted whole almonds for the pine nuts

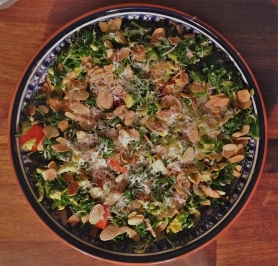
Kale Salad with Avocado and Pecorino

photo-39I’ve recently had a culinary epiphany with kale. I’m not quite sure why I never ate it before. Perhaps it was because of the prep involved to remove the stems, blanching etc., or maybe I just didn’t quite understand how unbelievably versatile and healthful this dark, leafy green could be. So I started experimenting with different recipes and cooking techniques that would allow me to add it to just about anything. Soups, salads, smoothies or as a simple side veggie, kale is the perfect choice. Unlike spinach which is full of water and reduces to almost nothing after cooked, kale retains it’s crunch and substance whether it’s been blanched, steamed or simply massaged with vinaigrette. Kale also happens to be really good for you. It’s packed with fiber, omega-3 acids, vitamin k and iron, all of which improve your body’s function and overall health. It’s hard to resist a vegetable that tastes so good and is good for you.
There are lots of recipes out there for kale salads, but for me it all comes down to the dressing and kale can stand up to a lot of the sweetness from honey or tanginess from mustard. The crunchy sprouts add a nice contrast to the creamy avocado and softened kale. You can add just about anything into this salad so feel free to make substitutes. This salad can be made up to 2 hours ahead without the cheese and tomatoes, and left to marinate in the fridge.

Kale Salad
Serves 4

1 bunch Curly kale, stems removed, washed and shredded
10-12 Brussel sprouts, stem removed and shredded
4 tbsp Slivered almonds, toasted
3 tbsp Pecorino romano
1 pint Cherry tomatoes, halved
1 Avocado, diced

Vinaigrette

1 shallot, minced
1.5 tbsp Dijon mustard
1 lemon, juiced and zested
3 tsp white balsamic vinegar
¼ cup olive oil
salt and pepper, to taste

Method

1. In a small bowl whisk together the shallot mustard, lemon juice, white balsamic, salt and pepper until combined. Gradually add the olive oil until it emulsifies.
2. Thoroughly wash kale, remove the stems and shred. Set aside in a large bowl
3. Remove the stems from the brussel sprouts, thinly slice and add to the kale*
4. In a small pan, gently heat the almonds, tossing until they are golden brown. Meanwhile, halve the cherry tomatoes and dice the avocado
5. Gently massage the dressing onto the kale and allow it to sit for 20 minutes in the refrigerator. Top with the remaining ingredients and grated cheese

* If making ahead, you can add the dressing now and allow the salad to sit in the fridge for a couple of hours

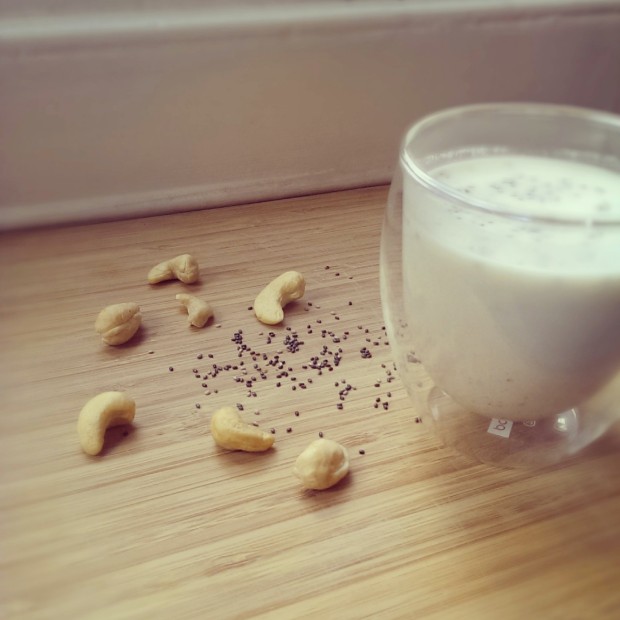
Homemade Cashew Nut Milk

IMG_20140207_110038

There’s been a lot of talk recently about homemade nut-milks. Free from dairy, preservatives, additives and sweeteners, it’s a great treat to try and make at home. Cashew milk in particular is high in many essential vitamins and minerals such as vitamin B, which helps with the body’s metabolic system, and magnesium which helps keeps bones healthy and strong. For those who are dairy intolerant, this is a great substitute. The only requirement is a decent blender as you need to pulverize the nuts to gain a smooth texture.

Now i’m not dairy intolerant but i do drink a lot of nut milks that are prepackaged and probably not that good for you ( when i read the labels i can’t pronounce half the ingredients in it.. that’s one sure sign). The great thing about making nut milk at home is you can add any natural sweeteners or spices that you desire… cinnamon, maple syrup, date syrup, vanilla.. the options are endless!

Here is a quick and simple recipe for cashew nut milk that you can easily whip up and keep for 2-3 days in the fridge.

Ingredients

  • 1 cup raw cashews
  • 4 cups water (divided)
  • 1 to 2 tablespoons honey
  • 2 teaspoons vanilla extract
  • pinch cinnamon
Instructions
  1. Soak the cashews in water at least 4 hours, or overnight in the refrigerator. Drain the cashews and rinse until the water runs clear.
  2. Add the cashews and first two cups of water to a blender. Blend until smooth.
  3. Blend in up to 2 cups more water depending on the consistency you’re looking for.
  4. Add the honey, vanilla extract, and cinnamon (optional).
  5.  Store the milk in a covered container in the refrigerator. It should keep for 2 to 3 days