Tofu Almond Soba Noodle

I’ve had some insanely busy past few weeks but I always try to make time for playing around with fun ingredients – this time it’s with Tofu!   Many people don’t like tofu mainly because tofu on its own has little to no taste. I’ve grown up eating tofu and eating all types of tofu (yes, there are different types!) but nothing beats a simple extra firm tofu grilled on a pan with a touch of olive oil and salt.  It’s the chewy texture that I absolutely love and if you pair it with punchy flavours, the tofu will take on the tastes of its neighbours.  This recipe is a deliciously nutty and easy to prepare vegetarian dish for tofu beginners and lovers alike! The creaminess of the almond butter and crunch of the toasted almonds balances the wonderfully chewy tofu leaving you wanting more…

Serves 4

400g buckwheat soba noodles
1 tbsp olive oil

400g extra firm tofu
2 tbsp olive oil
a few pinches of sea salt

Dressing
6 tbsp almond butter, 100g
2 tsp white miso paste
1 lime juiced
¼ tsp sea salt
6 tbsp water

For Garnish
30g flaked almonds
4 stalks spring onion, sliced
handful of mint leaves
1 red chili (optional)

  1. Make the almond dressing by combining all the ingredients except the water and whisk until even. Add the water one tablespoon at a time until consistency is like double cream.
  2. Bring a pot of water to the boil and cook the noodles for 3-4 minutes until al dente. Drain thoroughly and rinse under cold running water. Toss in 1 tbsp olive to prevent the noodles from sticking together.
  3. Cut the tofu into ½ cubes and cook on medium high heat with olive oil and 2 pinches of salt until golden brown, approximately 5 minutes. Add the noodles onto the pan for 30 seconds to reheat.
  4. Toss the warm noodles and tofu in almond dressing and garnish with almonds, spring onions, mint leaves and chili.

Granola Energy Bars

IMG_3570

I kind of have a thing for granola…and therefore granola bars. Unfortunately, granola bars are one of those snacks that don’t often receive great marks for health. Majority of those store-bought or packaged bars contain a lot of refined, processed sugar and they don’t actually fill you up. Half the time you don’t actually know what’s inside of them. These bars however, are different. I developed this recipe a couple of month’s ago for the Waitrose Kitchen magazine in the UK and they were very well received. There is something to be said for knowing what goes into your food, especially something that you may need pre or post workout for that extra boost of energy. Made with natural binding agents like medjool dates and almond butter, these bars are packed with protein and carbohydrates that will fuel you through the day. They do contain sugar, but naturally through the dried fruit and honey so your body processes it slower. Easy to prepare and packed with nutritious ingredients, these really are the perfect bar for a hearty snack because they keep you full for hours and don’t provide a sugar overload. Plus, they pack in plenty of healthy fats from the nuts and lots of fiber from the oats. You can easily substitute a different nut butter or variety of nuts and seeds within the bars, just be sure to keep the quantities the same. Keep stored in a container in the fridge for as long as they will last… I promise it won’t be long!

Almond Butter Energy Bars

Makes 12 large bars or 24 small bars
Prepare 15 minutes, plus chilling
Cook 20 minutes

IMG_3568

250 g (2.5cups)   Rolled Oats ( I like to use quick porridge oats, large flakes are too big!)
40   g  (2/3 cup)  Desiccated coconut
40   g  (1/2 cup)  Sliced Almonds
40   g   (1/2 cup)  Pumpkin seeds
150 g   (approx. 5 or 6)  Pitted medjool dates
50   g   (approx. 3) Prunes
85   g   (1/4 cup)  Honey
100 g   (roughly 1/2 cup) Meridian Crunchy Almond Butter
1 tbsp    Coconut Oil
3 tbsp    Water
1 ½ tsp  Ground Cinnamon
Pinch of SaltIMG_3538

Method

    1. Preheat the oven to 165C. Line a tray with parchment paper. Combine oats, coconut, seeds and nuts. Toast for 20 minutes, tossing occasionally until golden brown
    2. Meanwhile, in a food processor combine the dates and prunes and blitz until a smooth paste has formed. Add to the honey, almond butter, coconut oil, cinnamon, salt and water in a small saucepan. Place over medium heat and stir until combined.IMG_3545
    3. In a large bowl combine the oat mixture with nut butter mixture and stir until it has come together.
    4. Place mixture into a 9 “ square or rectangular mould lined with parchment paper, ensuring the surface is flat and even. Refrigerate until the mixture is firm and cool, 15-20 minutes. Slice into bars.IMG_3557

*If your dates don’t feel sticky and moist, soak them in water for 10 minutes then drain before processing. This will ultimately help hold the bars together better.

Lemon Coconut Loaf


IMG_3486

Coconut and lemon are a match made in heaven, and when that match is a dense crumbed, delicious and butter-less lemon loaf, well you may as well skip the rest of this and head straight to the recipe. But before you do, let me just point out that this is one of those cakes you need to have in your repertoire of baking. A slight variation on an otherwise very simple lemon yoghurt cake, the coconut and honey add a surprisingly decadent flavour and the ground almonds give the cake the perfectly dense texture similar to a pound cake ladened with butter…except there is none, so you can eat another piece, right?

Make this cake ahead and it stores well in the fridge for a couple of days but like many baked goods, it’s best moments are when it’s pulled straight from the oven, slathered with soft butter and served with a cup of tea.

IMG_3508

Ingredients:

1 cup all-purpose flour
1/2 cup ground almonds
2 teaspoons baking powder
1/2teaspoon kosher salt
1/2 cup sugar
2 tbsp honey
2 tablespoons finely grated lemon zest
1 tbsp lemon juice
3/4 cup whole-milk Greek yogurt
1/4 cup vegetable oil
2 large eggs
1/2 teaspoon vanilla extract
1/2 cup sweetened desiccated coconut

IMG_3476

  • Preheat oven to 350/180C. Line a nonstick loaf pan with parchment paper
  • In a bowl combine flour, ground almonds, baking powder and salt. Whisk to combine.
  • In a separate bowl combine sugar and lemon zest, rubbing the mixture together. Add yogurt, honey, lemon juice, vegetable oil, and vanilla. Add eggs, one at a time, whisking to combine.
  • Fold the dry ingredients into the egg mixture, finishing with the coconut.
  • Pour into the loaf tin and bake for 45-50 minutes until a toothpick comes out clean. If you find it’s browning too quickly, tent with tin foil. Remove from the tin and allow to cool slightly before digging in.


Date and Almond Energy Bites

dateswhole
Having spent time living in the Middle East I’ve become a big lover and fan of Medjool dates. They remind me of a much more relaxed and slower pace of life during Ramadan when dates and a glass of milk are often used to break a fast. Dates are not only rich in dietary fibre and antioxidants but these soft, delicious fruits can quickly boost your energy (which is needed when you have not eaten all day). While dates are quite sweet, they are an excellent low fat natural substitute for sugar or processed sweeteners. What’s more fantastic about them is that they contain key minerals that your body requires to maintain a healthy heart and blood pressure and prevent cardio vascular diseases, arthritis and other inflammation related ailments. These wonderful little fruits are great for no-bake raw recipes because the stickiness helps bind other ingredients together. In this recipe, I’ve created some simple but very tasty date and almond energy balls and added some raw cacao powder which is sure to satisfy your chocolate craving!
dates

Makes 12 energy balls

1 ½ cups raw almonds, 200g, (reserve 2 tbsp for dusting at the end)
2 tbsp raw cocao powder
1 tsp chia seeds
½ tsp fine salt

25 Medjool dates, 200g
2 tbsp raw almond butter

  1. Ground almonds in a food processor until finely ground (if you don’t have a strong enough processor, buy raw ground almonds and use 1 ¾ cup). Set aside 2 tbsp for dusting.
  2. Add cocoa powder, chia seeds and salt to the almonds.
  3. Remove pits from dates and add to the processor along with almond butter and blend until it forms a paste.
  4. Scoop a spoonful into your hand and roll into a bite-sized ball – make 12.
  5. Lightly roll the balls in ground almonds (optional).

Store these delicious little bites in a container in the refrigerator. Try not to eat them all at once!

Freekah and Beluga Lentil Salad

The best way to ease into a year of better eating (or cleansing) is to start by incorporating healthful, satisfying whole grains and veggies that keep you full and curb those incessant sweet cravings you developed over the holidays. Salads are by far the best place to start, and with all the superfoods available at your fingertips, it’s become even easier to eat well.

This freekah and beluga lentil salad covers all the bases. It’s simple, healthy, substantial and packed with nutrients. Beluga lentils are beautiful beads of nutrition that glimmer to the likes of caviar once cooked. Low in fat and packed with protein and fiber, lentils are one of the most nutritious vegetarian substitutes and will make even the most carnivorous in the family feel satisfied. The advantage of these little lentils are that they have a relatively quick cooking time and possess a delicious but mild nutty flavour that pairs well with lots of fresh herbs and citrus.

Freekah on the other hand is wheat that has been harvested while its still young. Often referred to as green whole or cracked wheat, it has a mildy nutty flavour and texture similar to bulgur wheat. It’s fairly low on the glycemic index and packed with protein, significant fiber and healthy minerals. Freekah is like the supped-up version of quinoa and works wonders in salads, soups and stews.

This salad is great for lunch but would make for a light but substantial dinner if topped with some extra protein such as a poached egg.

So what are you waiting for, go on and get Free-kah!

IMG_3358

Freekah and Beluga Lentil Salad
85g (1/2 cup) beluga lentils (or substitute du puy)
1 bay leaf
130g (1 cup) freekah
1 small fennel bulb, thinly sliced
1 large handful fresh parsley, leaves removed
½ cup dill, finely chopped
2 tsp. nigella seeds
60g (½ cup) pomegranate seeds
1 avocado, cubed

Dressing
1 tbsp. water
1 tbsp. apple cider vinegar
1 tsp. agave
1 tsp. mustard powder
1 garlic clove, finely chopped
1 tsp. soy or tamari
2 tbsp. lemon juice
1 tbsp. flax oil
1 tbsp. olive oil

  • To prepare the lentils, rinse well with cold water and place in a small saucepan with 1 cup of water and the bay leaf. Bring to the boil, reduce to a simmer and cook covered for 35-40 minutes until tender but still has a bite. Drain and rinse with cool water, allow to drain dry.
  • To prepare the freekah, rinse well with cold water and place in a larger saucepan with 2.5 cups of water. Bring to the boil, reduce and simmer uncovered for 20 minutes. Drain excess water and allow it to cool to room temperature.
  • In the meantime, thinly slice the fennel along with the dill and prepare the parsley.
  • To make the dressing, whisk all ingredients together except the oil. Slowly add the oils to emulsify, season to taste.
  • Combine the freekah, lentils, fennel, herbs, pomegranate seeds, nigella seeds, and avocado with the dressing. Season to taste. Serve chilled or at room temperature.

Tahini Cookies

It’s been a while since we’ve posted something sweet on the blog. Not only are we drawing near the holiday season (where sweets should always be in abundance) but we also tend to seek comfort in winter baking. Whether it’s the nostalgia of the holidays or the fact that the weather is getting cooler, baking is the one activity that seems to become ever so popular around this time of year. Having recently been blessed with some extra time on my hands, I find myself frequently flipping through cookbooks and food magazines for baking inspiration…or maybe it’s to satisfy my sugar addiction…one way or another, I’ve got plenty of time for some recipe testing.

If there was one cookie to satisfy the sweet and savoury palate, this is it. I used to buy these by the box from Ottolenghi around the corner from my flat, and when I worked in the pastry kitchen there, these were always the “broken” snacks we were being fed with our morning coffees to keep us awake and happy. The balance of sweetness combined with the buttery, almost creamy texture of the cookie is perfect. I think a lot of people get thrown off the name because it contains tahini, the sesame seed paste often affiliated with Middle Eastern cuisine, but the sesame lends its very own natural sweetness and creaminess to an otherwise very simple and standard shortbread. Trust me when I say these are the most addictive cookies you will ever make and even those who say they don’t like sweets will be begging you for more.

Ottolenghi’s Tahini Cookies- adapted from Jerusalem 

IMG_3329

130g caster sugar (granulated works too!)
150g unsalted butter, at room temperature
110g light tahini paste
½ tsp vanilla essence
25ml double cream
270g plain flour
4 tbsp sesame seeds

Method

IMG_3309

  1. In a stand mixer fitted with a paddle attachment, or a large bowl, cream together the butter and sugar until soft and combined. Careful not to over whip and aerate the mixture
  2. Add the tahini paste, vanilla and cream, mixing to combine. Gradually add the sifted flour and mix until it begins to form a dough
  3. Turn onto a surface and knead gently until the mixture has come together. Divide in half, roll into two logs and cover with cling film. Refrigerate for at least 1 hour until firm
  4. Preheat your oven to 200C. Line two large baking trays with parchment paper. On one tray, spread out 2 tbsp of sesame seeds and roll the chilled dough to cover evenly. Slice 2cm rounds and sprinkle with remaining seeds. Repeat with other log
  5. Place the rounds onto the clean baking tray, leaving enough space between them as they will expand slightly. Bake for 10 minutes until golden brown. Remove and let cool completely on a wire rack

*The great thing about these cookies is the dough can be made ahead, refridgerated for up to two weeks or frozen for up to two months. Once baked, keep in an air tight container for up to one week.


Roasted Cauliflower and Potatoes

This is the first time I have picked up potatoes that were not white, yellow or orange and look at the purple colour of these majesty potatoes once you slice them open!  Purple majesty is a natural variation crossed from potatoes that originate from the Andes that have developed deep red and purple colours.  However unlike regular potatoes, these deep purple-blueish spuds are packed with antioxidants which can help prevent cancer and cardio vascular related diseases.  These potatoes have the same goodness that you would find in other blue coloured superfoods such as blueberries and blackberries.  Plus, these purple spuds are relatively lower in sugar content versus other varieties.

purple potatoes mapleandmiso

The other lead vegetable is this salad is cauliflower.  I rarely pick up cauliflower these days but when I do, I am always reminded of how much I love the taste of roasted cauliflower (not the bland boiled ones from the 80s/ 90s). When seasoned and roasted well these fleurets are seriously delicious and I suspect that even traditional cauliflower-haters would learn to love this vegetable.

cauliflower mapleandmiso
If you are thinking of making this recipe, I know that cauliflower can be easily found but it could likely be difficult to find purple potatoes.  Feel free to substitute the purple majesty with regular new or fingerling potatoes because not surprisingly these purple potatoes taste, well, very potatoe-y!
salad mapleandmiso

Ingredients

1 cauliflower head, fleurets trimmed
12 majesty potatoes, sliced
1 garlic clove, chopped
1 tbsp olive oil
100g (1/2 pack) feta
salt and pepper to taste

1 pack rocket/ arugula

cauliflower seasoning
1 tbsp tumeric
1/2 tbsp cumin
1 tsp paprika
1 tsp cornflour
1/4 tsp salt
1/4 ground black pepper

dressing
2 tbsp cider vinegar (or white wine vinegar)
1 tbsp mustard
3 tbsp good olive oil
1/2 tsp salt
1/4 tsp ground black pepper

1. Preheat oven to 180C/ 350F
2. Trim the cauliflower fleurets into bite sized pieces, wash and dry
5. Mix the seasoning spices in a large bowl and toss cauliflower in seasoning. Bake on a lined tray for 40-50 minutes, turning a few times in between until a deep golden colour
3. Wash and slice potatoes lengthwise about 1/2 cm thick and chop garlic
4. Toss the potatoes in the garlic and olive oil and season with salt and pepper. Lay on a lined baking tray and crumble feta on top. Bake for 20-25 minutes until potato edges are golden crispy.
5. Make the dressing by mixing the mustard and vinegar until smooth, then add the olive oil, salt and pepper.
6. Wash and dry arugula. When ready to serve, toss the arugula in dressing coating evenly then gently mix-in the potatoes and cauliflower.

Simple Miso Tahini Eggplant

What I love most about this recipe is that it is incredibly easy to make and tastes oh-so-delicious!  Miso tahini eggplant (or aubergine as they call it in the UK) is a great dish for entertaining or for nights when you feel like going veggie.  So if you haven’t fallen in love with miso from our classic savoury Miso Oats recipe then give this dish a try.  Pair the eggplant with some brown rice or quinoa with a splash of soya sauce and dinner is all set!

eggplant mapleandmiso


Ingredients (serves 2 as main or 4 as a side)
2 medium sized eggplants, halved
2 tbsp olive oil
sea salt

parsley or spring onion for garnish

Marinade
2 tbsp tahini
2 tbsp white miso paste
1 tbsp maple syrup
3 tbsp mirin (can substitute with white wine or water)

  1. Preheat oven at 180C/ 350F
  2. Wash and halve the eggplant lengthwise. Score the flesh in a diamond patter without cutting through the skin. Brush flesh with olive oil and season with a pinch of salt. Bake skin side down on a lined baking tray for 20 minutes.
  3. Mix marinade and brush on top eggplant after initial baking. Bake for another 20-25 minutes until eggplant is soft and golden. Add garnish and serve.


Autumn Kale and Sausage Salad

While autumn has officially begun, we have been enjoying an abnormal but extremely pleasant flourish of summer sunshine in London. We’re talking about sunshine and 20C weather and it has been the driest September ever – at least ever since the weather people have been keeping track! So while I am ready for the warm savoury winter stews and soups, I am inspired to keep the cooking on a lighter side before the drearier London weather sets in.

lambsausageskale

I am very fortunate to have an incredible organic butcher down the street from where we live. http://farm.sheepdrove.com/. The team there is very knowledgeable, friendly and always smiling. I rarely cook red meat, but when I sent my husband to pick up some protein at the butcher (which never happens) he returned with some organic lamb and rosemary sausages – yum! The recipe below is my take on a warm autumn salad that will leave you feeling satisfied but requires very little work. It is a perfect weekday dinner that you can whip up within 30 minutes at home. The trick to this salad is not to overcook the kale so it maintains its texture and colour. Enjoy!

Serves 2

Ingredients
2 organic lamb sausages, 250g

200g baby new potatoes, halved

1 bunch/ 200g kale, stems removed, torn
4 baby radishes, thinly sliced
1 garlic clove, finely diced
1 shallot, finely diced
3 sprigs of tarragon or mint, keep some for garnish
1.5 tbsp olive oil
Sea salt and freshly ground pepper to taste

Directions

  1. Slice the lamb sausages into 2cm wide rounds and set aside.
  2. Wash and rinse potatoes. Cover in cold water in a pot and salt generously. Bring to a boil and simmer for 10-15 minutes until tender. Drain, cut into halves and set aside.
  3. Prepare the kale by removing stems and tearing into bite-sized pieces. Wash and dry the kale.
  4. Remove the stems from the herbs and roughly chop. Keep some whole leaves for garnish.
  5. Trim the radish ends and thinly slice. Combine the radishes, ½ tbsp olive oil, chopped herbs and salt and pepper.
  6. Finely dice the shallot and garlic.
  7. Heat a large pan with the olive oil on medium heat. Add shallots and cook for 2 minutes. Add the garlic and sliced sausages and cook for 5 minutes occasionally stirring until done.
  8. Toss in the kale and cooked potatoes and cook for 2-3 minutes until kale become a vibrant deep green (do not over cook the kale otherwise it will wilt and brown). Season with salt and pepper.
  9. Remove from the heat and toss in the herb infused radishes.
  10. When serving, garnish with fresh herb leaves.


Warm Quinoa with Lemon Yogurt Dressing

_MG_5656

I recently went for brunch at one of our ‘locals’, which in British lingo is the local pub or ‘public house’ that you regularly go to.   I was craving some classic fluffy scrambled eggs with chilli lime avocado toast or crème fraîche smoked salmon on toast.  Torn between the two, I had to make a game time decision when our server came to take our order and I went with the salmon. I was immediately pleased with my decision when the server brought salmon and eggs to the girl at the next table beside us – it looked beautiful and delicious!   However, the server then headed over to tell me that they had run out of salmon (shriek) and (get ready….) avocado and that the only other egg items they had available on the menu were the full English or hash (but no mushrooms or tomatoes because they ran out of those too). At this point, I was ready for a terrible food experience except that we ended up ordering the seasonal salad – warm chicken and fregola tossed in a lemon yogurt dressing. What the description didn’t include was that it also came with delicate and nutty tenderstem broccoli, thinly sliced radish, crunchy mangetout and sweetly bitter endive – a dish right up my alley. Was it ever yummy and here is my take on a warm brunch-friendly salad.

_MG_5629 copy

Warm Quinoa with Lemon Yogurt Dressing
Optional: Add the Grilled Yogurt Chicken

Serves 4

1 cup quinoa
1 ¾ cup water
salt

200g cherry tomatoes, quartered
100g mangetout, finely sliced
1 endive, sliced
200g tenderstem broccoli (or purple sprouting)
sea salt and pepper

Dressing
1 cup Greek yogurt
1 tsp white wine vinegar
1 lemon, juiced
3 tbsp olive oil
1 garlic clove
sea salt and black pepper to taste


  1. Cook the quinoa with water and pinch of salt in a pot. Bring to a boil then reduce and simmer for 12-15 minutes with the lid on until all water is absorbed and spirals are revealed. Turn off the heat and place a dry dishcloth over the pot with the lid on top until ready to serve. This will help absorb any excess water and keep the quinoa warm.
  2. Make the dressing by combining all the ingredients in a blender. (I like to use a hand blender for dressings). Keep aside.
  3. Wash and slice the cherry tomatoes, mangetout and endive.
  4. Cut the broccoli into bite size pieces and toss in olive oil, salt and pepper. Heat a fry pan and cook for 1-2 minutes until the broccoli becomes vibrant green.
  5. Toss all raw vegetables with the dressing and add the warm quinoa – gently mix. Top with the broccoli and/ or the Grilled Yogurt Chicken (which I have done here for a dinner meal).

Pink Grapefruit and Purple Kale Salad


grapefruitkale

It is Monday and after a deliciously indulgent week + weekend celebrating the birth of my new nephew, I am feeling a bit sluggish and experiencing some post-celebration blues.  So I needed something bright and cheery to kick off the week ahead and as usual… I turned to food!  I peeked into my fridge and saw that I had some perfectly ripe figs that would be great in a salad but there was not much else in there.

I headed over to my local green grocer to see what they had in stock and for the first time in a while I spotted some organic purple kale.  Yum and so pretty – just what I needed!  I also grabbed some other great detoxifying produce to help me get back on track and boost my energy level.  I picked up a pink grapefruit which is high in vitamin C and antioxidants plus I grabbed some immunity building and bacteria fighting cabbage.  I now had all the ingredients to make a gluten free vegan salad to try and cure the unwanted Monday Blues!

grapefruitkale_ingredientsServes 2

Ingredients
1/2 cup quinoa
1 cup water
pinch of salt

8 purple kale leaves, stems removed
1 medium sized grapefruit
2 figs, quartered
1 cup (100g) purple shredded cabbage

Dressing
1/2 shallot, minced
1 tsp dijon mustard
1 tsp maple syrup or honey
2 tsp rice wine vinegar (or any wine vinegar)
1/3 cup extra virgin olive oil
ground sea salt and black pepper, to taste

  1. Rinse quinoa in strainer. Add the quinoa, water and pinch of salt in a pot and bring to a boil then reduce and simmer for 12-15 minutes with the lid on until all water is absorbed and spirals are revealed. Turn off the heat and place a dry dish cloth over the pot for 5 minutes before fluffing with a fork.
  2. Combine all the dressing ingredients in a jar and shake vigorously to mix.
  3. Remove the stems from the kale, tear into bite size pieces, wash and spin dry.  Gently massage the dressing onto the kale and allow it to sit for 15-20 minutes in the refrigerator.
  4. Peel, seed and cut the grapefruit into segments, quarter the figs and slice the cabbage with a mandolin or with a knife.
  5. Toss the cabbage and quinoa with the dressed kale and garnish the salad with grapefruit and figs.

Cherry Raspberry Eton Mess

_MG_5582

A heat wave has hit London, and for the past couple of weeks it’s been one hot, humid mess in the city. It’s hard to complain though when 95% of the time here it’s either raining or overcast, so everyone tries to make the most of the sunshine and warmer temperatures.

Baking in this weather requires serious determination. Resisting the temptation to turn on the oven in my flat (which has no air con) and make something that requires little time in the kitchen is why a fresh summer dessert like an eton mess is the perfect option, and it’s oh so simple to make.

A very traditional pudding (that’s dessert for you North American folk) in the UK and named after one of the most prestigious colleges, it is typically comprised of meringues, cream, and strawberries. Probably one of the easiest desserts to build your own interpretation on, using whatever seasonal fruits or berries you would like. I chose cherries, which are just coming into season and raspberries to compliment the sweetness from the cherries and tartness from the yoghurt I folded into the cream. I’m cheating a little by using store-bought meringues, but they happen to be raspberry meringues from Ottolenghi so I don’t feel too bad. Try and find the best quality meringues you can, the ones with the gooey center and crisp outside work best for a dessert like this. Eton mess also happens to be perfect for crowds, similar to a trifle you can build it in a large bowl just make sure you serve it right away as you want maintain the crunch in the meringue. Perfect for hot summer nights with an aperitif, it’ll make you wish summer would last just that little bit longer.
_MG_5574

Serves 4
*quantities can easily be increased, just ensure the cream is approximately double the amount of yoghurt

2 large meringues, broken into large and small pieces
300 mL double cream
170g plain greek yoghurt
1 vanilla bean, split and seeds removed
¼-1/2 cup icing sugar, depending on the sweetness you want
250g raspberries (one punnet) divided in half
250 g cherries, pits removed but leave a couple whole for garnish
3 tbsp granulated or caster sugar
½ lemon, zest and juice
¼ cup shaved almonds, lightly toasted

_MG_5567

Compote

  • In a small saucepan combine half the raspberries and cherries with lemon zest, juice, and sugar
  • Bring to the boil and then reduce to a simmer for 10-15 minutes
  • Transfer to a small bowl and allow to cool completely. This can be made up to 2 days in advance and stored in a air tight container in the refrigerator

Mess:

  • In a large metal bowl, gently begin to whip the cream until soft peaks begin to form. Add the vanilla and sugar and whisk a bit further.
  • In a separate bowl, whisk the greek yoghurt until smooth. Gently fold into the cream mixture
  • In your serving dish begin to layer the items beginning with the cream, then the compote, remaining fresh berries and meringues. Repeat as many times as possible in the serving dish. Top with cream and toasted almonds. Serve immediately


Turkey Courgette Burgers

IMG_1889Turkey Courgette Burgers with Yoghurt and Slaw

There are a few things I truly miss about Canadian summers: consistently hot weather, cottage country, and barbequed food. It’s practically impossible to recreate the flavours of the grill over a stovetop, regardless if you have the best cast iron grill pan or most delicious homemade bbq sauce. The smokiness and caramelization that occurs on foods over a hot flame are simply the best. Unfortunately for me I have no barbeque in my tiny flat, so I needed to improvise!

I had a hankering for a summery meal that could be made indoors so I turned to Ottolenghi once again for inspiration. I had made these turkey “burgers” once before and they were mediocre… that was before I knew how to really cook and go beyond the recipe to showcase flavour. This time I knew what I was after, so little by little I started to work around the recipe until I was happy with the end result. As I daydreamed about these burgers going on a real grill, I somehow managed to concoct something rather marvelous for being done in a fry pan. Packed with bright flavours of chili, ginger and coriander, these little burgers were surprisingly delicious. Turkey is very low in fat therefore dries out quickly, so the courgette helps quite a bit to add moisture back into them. If I were lucky enough to grill these I would add some breadcrumbs into the mix as its quite wet and probably wouldn’t hold up perfectly, however this is completely optional and you could go rogue and attempt to grill them as is. Don’t be shy with the quantities, if you like a little more of something or less of another just play around with it. Other fresh herbs can easily be added or substituted…think summertime so parsley, dill, basil would all work perfectly. Serve these up in buns or bun-less if you prefer, with a good dollop of sumac yoghurt and a hearty scoop of guacamole.

Turkey Burgers
Serves 4

500g Turkey mince
1 egg, beaten lightly
2 tsp ground cumin
2 tbsp fresh mint, finely chopped
3 tbsp fresh coriander, finely chopped
2 garlic cloves, minced
2 tbsp fresh ginger, finely grated
1 courgette, roughly grated
3 spring onions, finely chopped
1 green chili, seeds removed and finely chopped
salt and pepper
2-3 tbsp vegetable oil
2-3 limes, to serve
*1/2 cup breadcrumbs (optional)

  • Combine the turkey mince, ground cumin, mint, coriander, garlic, ginger, chili and spring onions in a large bowl.
  • Add the grated courgette and egg and mixing with your hands to combine. Season well with sea salt and fresh ground black pepper
  • Form into small patties (roughly 65g each) or larger ones for a proper burger. I managed to get 14 small patties out of the mix.
  • Preheat the oven to 400F/200C and line a tray with foil or baking parchment.
  • Heat a non-stick fry pan with 1 tbsp of oil, in small batches brown the patties on all sides, adding more oil when needed.
  • Place on the tray and bake in the preheated oven for 5-7 minutes or until the turkey is no longer pink inside.
  • Alternatively, preheat your barbeque to medium high heat. Lightly grease the rack with vegetable oil and cook the burgers for 4-5 minutes per side until done.

IMG_1896

Slaw
Serves 4

1 fennel bulb, tough stalk removed and finely sliced
¼ white cabbage, finely sliced
1 red onion, finely sliced
1 carrot, julienned
3 tbsp + 2 tbsp fresh mint leaves, torn
½ red chili, seeds removed and finely chopped or sliced

Dressing
1 tbsp pomegranate molasses
2 tsp honey
1 tbsp tahini paste
1/2 tbsp warm water
1 lemon, zest and juice
1 tbsp olive oil
1 tbsp fresh ginger, finely grated
salt and pepper to taste

  • Combine the fennel, cabbage, carrot, chili, onion and 3 tbsp of fresh mint. Cover and refriderate until needed.
  • In a separate bowl, combine the pomegranate molasses, honey, tahini, water, lemon juice and zest, olive oil, ginger and whisk to combine. Season to taste. If too thick, dilute with lemon juice.
  • Before serving, toss the slaw with the dressing and top with remaining mint leaves.

Guacamole
2 avocados
1 lime, zest and juice
½ lemon, juice
½ red chili, seeds removed and finely chopped
1 tbsp fresh coriander, chopped

1. In a small bowl, gently mash the avocado leaving larger chunks. Add the lemon juice, chili, fresh coriander, lime juice and zest and mix to combine. Season to taste. Keep refrigerated until needed.


“Green” Bulgur Salad


Processed with VSCOcam with f2 preset

There is something about a good salad recipe that will never get old. Sure you can experiment with interesting flavour combinations or exotic ingredients, but there is comfort in familiarity and simplicity that makes certain dishes really stand out.

I came across this recipe in one of Ottolenghi’s books and what really drew me in was the herb paste used to turn the couscous from grainy yellow to vibrant green. Brilliant! (I thought to myself as I began to rummage through my fridge searching for the necessities). I for one love couscous but thought I would use another grain I’ve become all too fond of recently, bulgur wheat. Healthier, nuttier, and full of texture, bulgur is a great whole grain substitute to couscous (which is essentially pasta). I do feel like I’ve used it quite a bit in recipes posted, but it’s just become so versatile in my kitchen (so apologies, if you want to use couscous, please feel free to stick to it!)

The herb paste is basically a pesto, which with help from some lemon juice and zest, transforms this salad into something spectacular. It’s so fresh and packed with robust flavours from five different herbs. You can easily substitute the herbs or add more of one or another if you fancy. The salad can be dressed up to 2 hours before eating and is great cold or at room temperature. As with most of our salads, a good sprinkling of pomegranate seeds and a ripe avocado make the perfect finishing touch.

“Green” Bulgur Salad

120 g bulgur wheat (600 mL of water to boil)
1 avocado, diced
½ pomegranate, seeds
¼ cup whole almonds, roughly chopped and toasted
1 onion, finely sliced
1 tbsp olive oil
1 pack of rocket (I used a rocket, watercress and baby spinach mix)

Herb Paste
4 tbsp coriander
4 tbsp parsley
3 tbsp dill
3 tbsp tarragon leaves
3 tbsp mint leaves
1 lemon, zest and juice
1/3 cup extra virgin olive oil
salt and pepper to taste

  • In a saucepan, add the bulgur wheat and cover with water. Bring to the boil, reduce and simmer covered for 15 minutes. Drain and rinse well with cold water. Spread bulgur onto a clean dishcloth to absorb any excess moisture.
  • In a small pan, gently heat olive oil over medium heat and add onion. Cook for 10-12 minutes until the onion slices are nice and caramelized. Remove from heat and let cool.
  • In a food processor, combine all herbs and blitz until a paste begins to form. Add olive oil, lemon juice, zest, salt and pepper and blend until smooth.
  • Combine the bulgur with the herb paste, avocado, pomegranate and almonds. Add half of the mixed greens and toss.* it is at this point that you can cover and allow the salad to sit and marinate
  • Before serving, toss with remaining greens and a sprinkling of sea salt and freshly ground pepper


Saffron Yogurt, Broad Bean and Basil Barley Bowl


Everyone is always resolving to eat better. While trying to nix the habit of multiple bags of crisps or those late night chocolate bars, we all seem to have our weaknesses when in reality it’s okay, because its all about balance.

For me, balance is trying to eat healthier throughout the week, and I’m starting to get a little tired of quinoa, so I’d like to introduce you to barley. I feel as though barley often gets overlooked. High in nutritional value, versatile in preparation (barley risotto anyone?) and packed with a delightful nutty flavour, it’s the perfect addition to soups, salads, or even breakfast items.

This was one of those kitchen sink recipes and whipping up a late lunch can sometimes prove to be quite a challenge. I wanted to feel full and satisfied and luckily I had a bit of time on my hands (Peeling broad beans is a hassle but worth the time for the delicate spring vegetable). The addition of basil oil combined with the saffron yogurt transforms this dish from a simple salad to something out of the ordinary (really, it’s that good!)

This would make an excellent dinner served alongside a piece of roast lamb perhaps, or even some grilled white fish.

Serves 2 for dinner

1 cup barley
3 cups vegetable stock

10 broad beans pods, or edamame
12 cherry tomatoes
100g or 1/2 pack of crumbled feta
1 avocado
100g or 1 pack lambs lettuce
1 tsp of fresh thyme leaves

Basil Oil
1 cup basil leaves
1/4 cup olive oil
1/2 lemon, juiced
sea salt and fresh ground pepper

Saffron Yogurt
3-5 saffron strands
1/2 lemon, juiced
1/2 cup of greek yogurt
sea salt and fresh ground pepper

  1. Combine 1 cup of barley and 3 cups of vegetable stock. Bring to a boil then reduce to a simmer with a lid on for 40-45 minutes or until the barley is soft and chewy. If there is excess water, set aside with the lid on for 10 minutes or drain if needed.
  2. Remove the broad beans from the pod. Blanche the broad beans in boiling water for 90 seconds then drain and immediately chill in cold water. Carefully peel the skin and set aside the beans.
  3. Prepare the remaining vegetables by cutting the tomatoes into quarters, crumbling the feta and cutting the avocado into cubes.
  4. Make the basil oil by blending (hand blenders work great and are easy to clean!) the basil leaves, lemon juice and olive oil for 2-3 minutes.
  5. Infuse the saffron with 2 tbsp of boiling water and set aside for 5 minutes then add the lemon juice. Mix the yogurt with the saffron lemon water.
  6. Toss the barley with the tomatoes, thyme and half the basil oil. Dress the salad with feta, avocado, lambs lettuce and drizzle the yogurt and basil oil.

Roast Rhubarb Crumb Cake

IMG_4810It’s come to that time of year when you begin to feel a bit impatient. Spring has (sort of) arrived with longer days, extended hours of sunshine, and the realization that we are already well into the New Year.

It’s been a few months of change but with lots of great opportunities ahead, and waking up today to see ‘May 1st’ on the calendar was exciting but also daunting. Not only because spring brings new hope and good vibes into everyone’s lives, but also because it’s a substantial mark in the calendar. (Basically, it’s time to really get moving!)

Spring reminds me of my passion for baking because of all the great fruit you can find at the local markets. Reminiscent of spring back home, Rhubarb is one of those ingredients you can buy year round in the UK, something I found quite surprising upon moving here. The variety, called forced rhubarb, is grown throughout the winter months in greenhouses with no light, allowing the rhubarb to feed off the stored carbohydrates from the roots of the plant. I prefer to stick to the fresh spring product, so naturally I grabbed some at the store the other day curiously wondering what it would be transformed into.

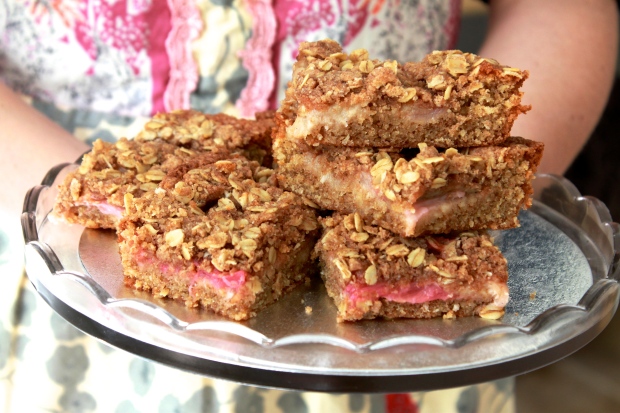
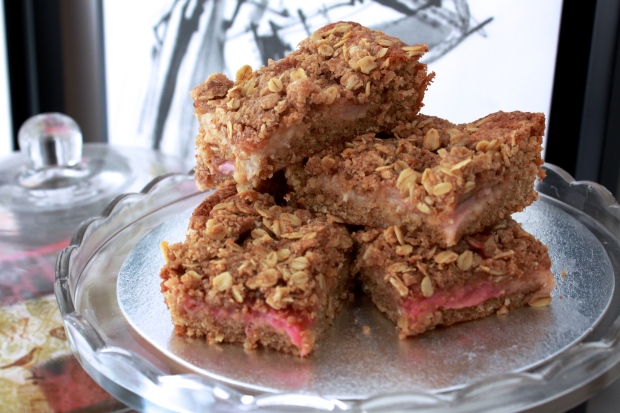
The crumb cake is a twist on a basic coffee (or tea!) cake. Simple, yet satisfying, it’s one of those bar cakes you don’t want laying around out of fear that the entire thing could possibly be consumed within one sitting. The rhubarb works perfectly here because of the tart flavour and soft texture it adds to the cake. Rhubarb perfectly peaking through the middle layer, along with a classic crumb topping transform this otherwise unassuming tea-cake into something so splendid you’ll want to share it with all of your friends.

Rhubarb Crumb Cake

For the rhubarb:
250g (1 cup) fresh rhubarb
25 g (¼ cup) caster (granulated) sugar
squeeze lemon juice
½ vanilla pod, seeds removed
splash of water

For the topping:
45g (3 tablespoons) unsalted butter, cold
45g (1 1/2 tablespons) demerara sugar
60g (a little under 1/2 a cup)
white spelt flour ( or all- purpose)
50g (1/2 cup) jumbo oats
2 tsp ground ginger
2 tsp ground cinnamon

For the cake:
115g (1 stick) unsalted butter, softened
2 medium eggs
160g (2/3 cup) caster (granulated) sugar
15 mL maple syrup
½ vanilla pod, seeds removed
95g (2/3 cup) white spelt flour
25g (1/4 cup) quick porridge oats, or large flaked oats roughly processed
1/2 teaspoon baking powder
1/4 teaspoon bicarbonate of soda
2 tbsp dessicated coconut
1 tsp cinnamon
A pinch of salt

Preheat the oven to 160C/325F

To prepare the rhubarb, trim the ends and place in a roasting pan with sugar, lemon and vanilla to toss with splash of water. Cover with foil and roast for 20 minutes or until tender. Remove and let cool.

To make the crumble topping, rub together the flour, sugar, flour and oats until you have something that resembles breadcrumbs. Chill in the fridge until needed.

Line a 20cm square baking tin with parchment paper overhanging the side and butter well.

IMG_4775

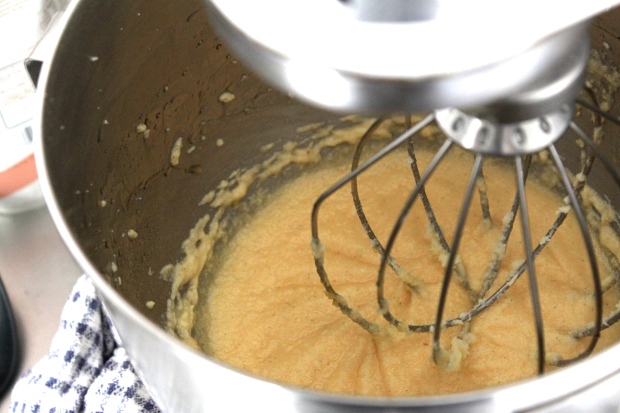
To make the cake, beat the butter and sugar until smooth.  Add the eggs, one by one, continuing to beat until they are incorporated. Add the vanilla and maple syrup and beat until combined. Finally, sift together the flour, oats, the baking powder, bicarbonate of soda and salt and fold the dry ingredients into the wet.

IMG_4778IMG_4783

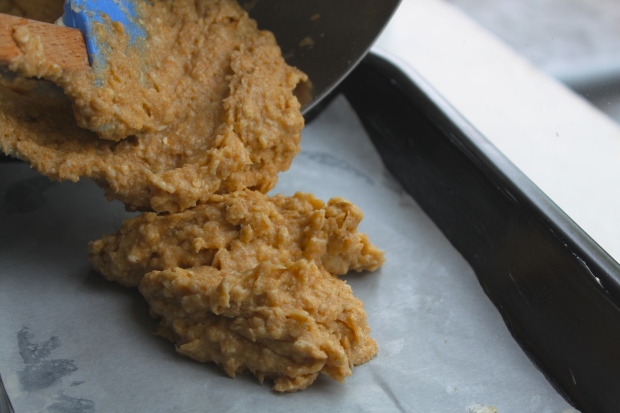
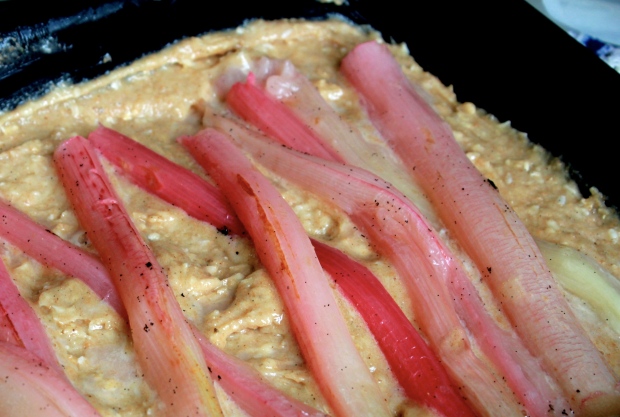
Spoon the cake mixture into the tin, smooth and top with roast rhubarb. Sprinkle the crumble mixture over the top and bake for 35 – 40 minutes until the topping is golden and the cake is cooked all the way through.

Allow to cool in the tin for 10 minutes before using the parchment paper to pull the cake out of the tin. When cool, slice into squares.

IMG_4804


Steamed Artichoke and Anchovy Aioli

artichoke_ingredientsWhen I dip, you dip, we dip!

When it comes to dips, we think that it is pretty hard to beat a rich creamy aioli made with fresh egg yolks! And if you haven’t already discovered this, what better vegetable to dip into your homemade mayo than beautiful sweet artichoke petals? This recipe is easy to make and makes a stunning hors d’oeuvres for family and friends.

artichokeaioli

Ingredients
1 large globe artichoke
1 bouillon cube
water to cover the artichoke

Aioli
5g mustard
10 ml white wine vinegar
1 egg yolk
1 pinch of salt
300 ml vegetable oil
1 garlic clove
1 anchovy
1 pinch paprika
Salt and pepper to taste

artichoke_mapleandmiso

artichoke_halved

    1. Remove the stem by laying the artichoke on its side and holding the bulb down with one hand and grabbing the stem very close to the bulb with the other hand. Snap the stem by pressing down on the stem rotating 3 or 4 times. Cut the artichoke in half.
    2. Place the artichoke halves in to a large pot covered with water and bouillon cube, bring to a boil then reduce to a simmer for 30-40 minutes. To test, pierce the choke at the base with a knife, it should be tender with little force applied. You can also try to remove a petal, if it has an incredibly soft texture, it’s cooked… If not, cook for a bit longer.
    3. In the meantime, make the aioli by blending together the mustard, vinegar, yolk and a pinch of salt until you achieve an even consistency.
    4. Slowly drizzle in the oil while blending until it becomes a mayonnaise-like consistency.
    5. Dice the anchovy and garlic and stir into the aioli.
    6. Season with salt and pepper (taste to check for correct seasoning) then add a sprinkle of paprika on top of the dip to finish the dip.
    7. Once the artichoke is cooked, let it cool for 5 minutes and peel the petals starting from the bottom.

* Once all of the leaves have been removed, you are left with the choke. With a spoon, scoop out the fuzzy centre and discard. You can then slice the choke and pan fry in olive oil for an additional snack!

The Best {Gluten-free!} Brownie

IMG_4745It’s Friday! And raining… oh so typical of London spring. We were feeling in the need for a little pick-me-up this afternoon while strolling around Portobello Market after finishing some work. What was quick, easy, and baked in under an hour (as our patience was running low!) Brownies! Not just your typical brownie though, a gluten-free brownie packed with salted caramel, hazelnuts and a pinch of chili. If you can resist cutting a piece from them fresh out of the oven, we applaud you… because we were unable to!

P.S. Don’t be scared of homemade caramel, follow the steps below, it’s easier than you think!

INGREDIENTS

For the caramel:

125g (1/3 cup) caster sugar
65ml (1/3 cup) double cream
40g (3 tablespoons) unsalted butter
1/8 tsp maldon sea salt

For the brownies:

150g (12 oz) dark chocolate (minimum 70%, roughly chopped)
150g (6 oz) milk chocolate
175g (1 1/2 sticks) unsalted butter
175g (1 cup less 1 tablespoon) demerara sugar
4 eggs
1 teaspoon vanilla extract

50g (1/2 cup) ground almonds
40g (1/2 cup) cocoa powder
1 teaspoon bicarbonate of soda/baking soda
1/4 teaspoon salt
1 pinch chili powder (optional)
50g (3 oz) hazelnuts, toasted and roughly chopped (optional)

INSTRUCTIONS

In a large heavy- bottomed saucepan, heat the sugar, swirling as it begins to melt. When it is golden brown and liquid, remove from the heat and pour in the cream (it will bubble, don’t worry!). Swirl to incorporate the cream, while adding small pieces of butter and salt until combined. Pour into a bowl and set aside.

IMG_4722IMG_4727

For the brownies, preheat the oven to 180C/350F and line the bottom and sides of a 23cm square tin with parchment paper

Melt the chocolate and butter in a bowl over a bowl of simmering water, stirring with a spoon until melted. Remove from the heat, add the sugar and beat well. With a whisk, gradually add each egg, beating until combined. Add the vanilla then gently mix in all of the dry ingredients with a spatula or wooden spoon. Stir in the hazelnuts.

IMG_4728

IMG_4730

Pour about 2/3 of the batter into the lined tin, add dollops of caramel, using a knife swirl the caramel throughout the mixture. Cover with the remaining brownie batter.

IMG_4739


Bake for 35-40 minutes until just firm to the touch. Remove from the oven and allow to cool completely before cutting (if you can resist!)

IMG_4746


Spring Crab and Pomelo Salad

The inspiration for this salad came from a recent visit to the relatively new restaurant House of Ho in Soho, London. The crab and pomelo salad it took me right back to my childhood when my parents would bring home this unique South Asian citrus fruit. Similar to a grapefruit, the pomelo is the largest citrus fruit with sweet flesh and a very thick rind. A delicious and healthy substitute to another citrus variety, the pomelo transforms this otherwise simple salad into something spectacular. The sweet and savoury combination of flavours from the soy and ginger dressing also complement the delicate crab quite well. You can easily substitute another citrus such as grapefruit or orange segments if pomelo is difficult to find. Best made fresh, this salad is simple to make, and makes the perfect spring lunch or light dinner!

Dressing
20 mL (1 tbsp + 1 tsp) fish sauce
5 mL (1 tsp) soya sauce
3 mL (1/2 tsp) sesame oil
1 lime, juiced
2 tsp ginger, finely grated
1 tsp sugar
½ clove garlic, minced

Ingredients
½ cucumber, seeds removed and julienned (matchstick)
¼ pomelo segmented then cut into small pieces, skin and seeds removed
½ chili, finely sliced
1 cup shredded white cabbage
½ cup thai basil, roughly torn
½ cup fresh mint, roughly torn
¼ salted peanuts
2 tbsp fried shallots
¼ cup fresh lump crab meat (fresh or tinned)
1 tbsp coconut oil
½ tbsp. ginger, finely grated

Dressing:

  • Place all ingredients in a small bowl, whisking to combine. Season with salt and pepper to taste.

Assembly:

  • In a large bowl combine cabbage, cucumber, chili, fresh mint and Thai basil.
  • In a small saucepan, gently heat the coconut oil and ginger until fragrant. Remove from the heat, gently add the crabmeat and toss to coat.
  • Gradually add the dressing to the salad, along with the crabmeat being careful to toss gently as the flesh is delicate and will break apart
  • Top with crispy shallots and peanuts, garnish with more fresh mint and Thai basil

Chocolate Hazelnut Oatmeal Cookies

Processed with VSCOcam with f2 presetHow does one make the perfect chocolate chip cookie? I’ve tried so many recipes over the years, and I have to say, it’s a difficult cookie to perfect. It’s also quite subjective. Oats? Nuts? Thin and crispy or soft and chewy? I like to think there are many perfect chocolate chip cookie recipes, and it all comes down to what you’re in the mood for.

A friend kindly introduced me to this very simple base recipe that I’ve taken up a notch with some additional spices and ingredients. This cookie has it all. Crispy sides with a chewy middle, texture from the oats, melt-in-your-mouth chocolate pieces, and a delicious nuttiness and crunchiness from the hazelnuts. It almost sounds too good to be true! Fresh out of the oven, these cookies are in their prime, wait a day or two (if they even make it) and they will need a slight reboot in a hot oven to crisp up due to the oats attracting moisture. Nevertheless, this is one of those recipes I’ll keep in my repertoire, and in my freezer, for those late nights when you need a sweet fix.

Ingredients

125g (1/2 cup) butter, room temperature
100 g (1/2 cup) sugar
50 g (4 tbsp) muscovado or dark brown sugar
1 egg
1 tsp vanilla extract
½ tsp ground cinnamon
140g (1 cup + 1 tbsp) all-purpose/ plain flour
½ tsp baking powder
½ tsp salt
75 g (3/4 cup) large flake rolled oats
50g (1/2 cup roughly) skinned hazelnuts, chopped into pieces
150g (roughly 5oz or ¾ cup) dark chocolate bar, chopped into chunks

Instructions

  • Preheat the oven to 180/350
  • Cream butter and sugars together in a bowl until light and fluffy. Beat in the egg and vanilla
  • Sift the flour, baking powder, salt and mix into the dough. Add the oats and chocolate and stir until combined.
  • Cover and refrigerate at least 30 minutes or even better overnight
  • Line a baking sheet with parchment paper
  • Take small amounts of dough, about the size of a golf ball, and roll them into balls.
  • Gently flatten the tops of the dough with your hand and place in the oven to bake for 15 minutes or until golden brown
  • Remove from the oven and allow to cool on the tray for 5 minutes before moving them to a cooling rack

*Chef’s Tip to Make Ahead: Pre-roll the dough balls and pop them into the freezer for at least 2 hours on a baking tray. Remove and store in a freezer bag, that way you can bake as little (or as many!) cookies at a time as you want!